13 KiB
| title | visible | indexed | updated | taxonomy | page-toc | |||||||||
|---|---|---|---|---|---|---|---|---|---|---|---|---|---|---|
| Preferences | true | true |
|
|
Preferenze
Le preferenze dell'utente consentono di regolare varie opzioni e impostazioni che controllano il comportamento e l'interfaccia utente dell'applicazione webmail. Se vuoi saperne di più, controlla la documentazione Roundcube
Dopo aver modificato le preferenze, non dimenticare di salvarle facendo clic sul pulsante Salva sotto il modulo delle impostazioni.
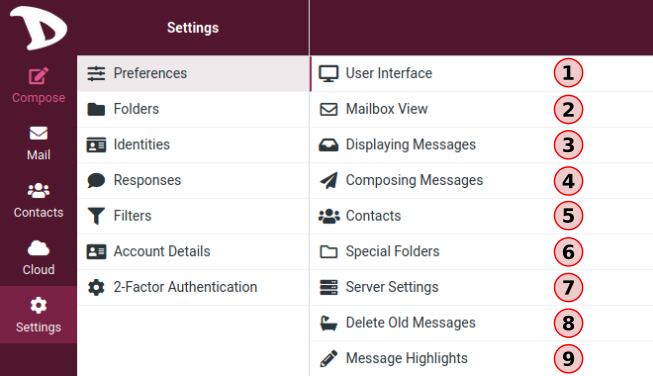
01. Interfaccia utente
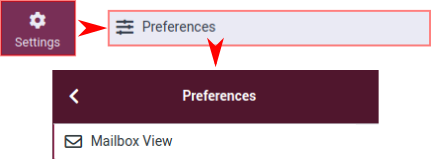
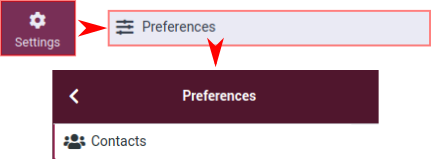
Per modificare le configurazioni dell'interfaccia utente, vai su Impostazioni, Preferenze e scegli Interfaccia utente.

Questa è la sezione dell'interfaccia utente:

Opzioni principali:
-
Lingua: la lingua dell'interfaccia webmail viene selezionata automaticamente da quella del sistema operativo del tuo computer. Tuttavia, se non dovesse funzionare o volessi cambiarla in una lingua specifica, puoi farlo qui.
-
Fuso orario: il client traduce automaticamente le date nel tuo fuso orario locale. Per impostazione predefinita, è impostato su Automatico, consentendo alla webmail di utilizzare il fuso orario configurato sul tuo computer. Se vuoi/devi cambiarlo, seleziona un fuso orario specifico dall'elenco.
-
Formato ora: seleziona come visualizzare l'ora.
-
Formato data: seleziona come visualizzare le date.
-
Pretty dates: questa opzione "traduce" le date vicine a oggi in termini relativi come "Oggi", "Ieri", ecc.
-
Visualizza la voce successiva dell'elenco dopo l'eliminazione/spostamento: abilitare questa opzione se si desidera passare direttamente al messaggio successivo dopo aver eliminato/spostato un messaggio.
-
Aggiorna (controlla nuovi messaggi, ecc.): seleziona la frequenza con cui il client cercherà nuovi messaggi.
Interfaccia
Qui è dove puoi scegliere l'aspetto del client web. Barbabietola è l'aroma Disroot Webmail predefinito.
Browser Options
Gestisci i popup come finestre standard: sia che tu voglia scrivere un messaggio o aprirlo, puoi scegliere di farlo nella stessa finestra, in una nuova o in una nuova scheda. Quando questa opzione è abilitata, il client si comporterà in base alle impostazioni del tuo browser.
- Registra il gestore del protocollo: puoi registrare questa app webmail da aprire ogni volta che fai clic su un collegamento e-mail da qualche parte sul web.
02. Vista della casella di posta
Per impostare o modificare le opzioni relative alla casella di posta, vai su Impostazioni, Preferenze e scegli Vista casella di posta
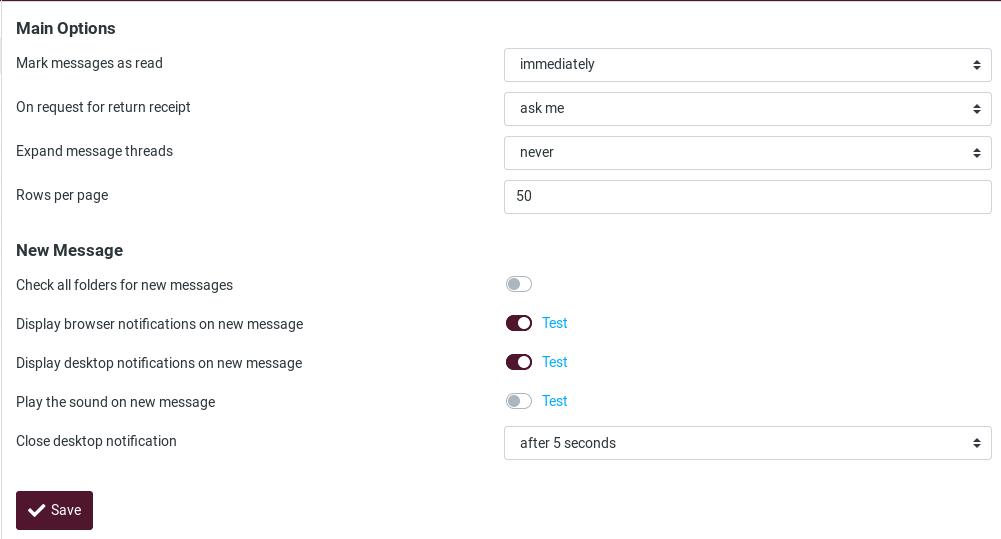
Opzioni principali della mailbox:
-
Segna messaggi come letti: imposta per quanto tempo dopo aver selezionato un messaggio il client deve contrassegnarlo come letto.
-
Richiesta di ricevuta di ritorno: indica cosa deve fare il client se il mittente di un messaggio richiede una ricevuta di lettura.
-
Espandi thread di messaggi: quando si elencano i messaggi nei thread, questa opzione controlla il modo in cui i gruppi di conversazioni vengono espansi nell'elenco.
-
Messaggi per pagina: il numero di messaggi visualizzati nella casella di posta.
Opzioni nuovi messaggi
-
Controlla tutte le cartelle per i nuovi messaggi: quando abilitato, il client controllerà tutte le cartelle per i nuovi messaggi. Ciò è utile quando sono attivi filtri che inoltrano la posta in arrivo a cartelle diverse da Posta in arrivo. Se è disabilitato, per impostazione predefinita, solo la Posta in arrivo viene controllata periodicamente per i nuovi messaggi.
-
Visualizza le notifiche nel browser per i nuovi messaggi: abilita o disabilita le notifiche sul tuo browser quando arriva un nuovo messaggio.
-
Visualizza notifiche desktop per i nuovi messaggii: abilita o disabilita le notifiche sul desktop quando arriva un nuovo messaggio
-
Riproduci suono all'arrivo di nuovi messaggi: abilita o disabilita una notifica audio all'arrivo di un nuovo messaggio.
-
Chiudi notifica desktop: scegli dopo quanto tempo deve essere chiusa la notifica desktop.
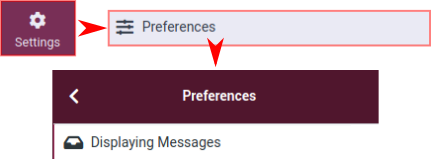
03. Visualizzazione dei messaggi
Qui troverai le impostazioni relative a come il client deve gestire i messaggi.
Per accedere a queste opzioni, vai su Impostazioni, Preferenze e scegli Visualizzazione dei messaggi.
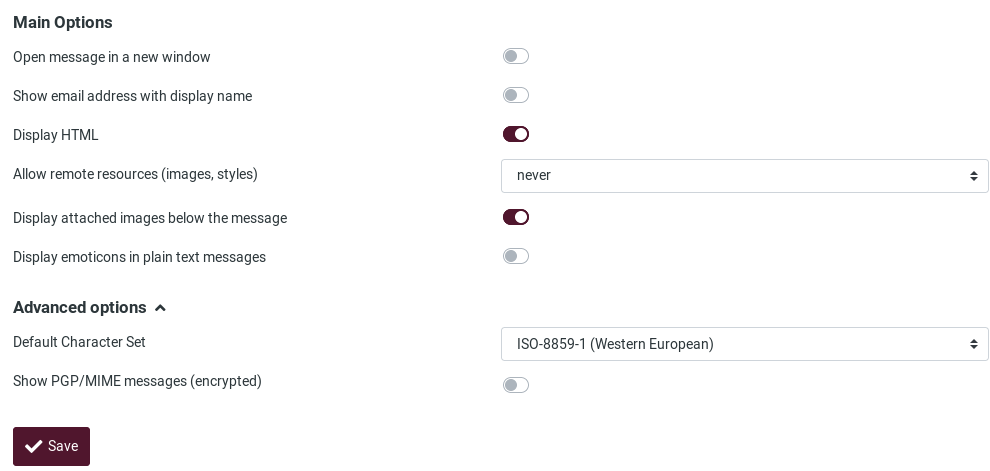
Opzioni principali
-
Open message in a new window: When this option is enabled, double-clicking on an email will open it in a new window.
-
Show email address with display name: If enabled, the sender's email address will be displayed next to his/her name when a message is opened.
-
Display HTML: Enable this option to display rich text formatted messages. When disabled, formatted emails will be converted to plain text.
-
Allow remote ressources (images, styles): Formatted (HTML) messages can contain references to third-party resources. Allowing this type of content to be loaded by default can represent a serious risk to privacy. Choose how you prefer the client to proceed with them.
-
Display attached images below the message: Check this option if you want images attachments to appear below the message.
-
Display emoticons in plain text messages: When enabled, the client will "translate" pattern of characters such as :) or :( into emoticons.
Advanced options
-
Default Character Set: A character set is a complete set of the characters (numbers, letters, punctuation marks, special symbols) and their number codes that can be recognised by a computing device. Here, you can select the character set/language the majority of your email correspondents use.
-
Show PGP/MIME messages (encrypted): When encryption is enabled on the server side, checking this option displays the encrypted content of a message in the mailbox view.
04. Composing Messages
In Settings, Preferences, choose Composing Messages
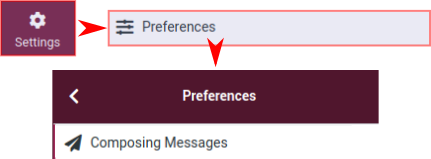
These options and settings determine the look and the experience of composing an email.
-
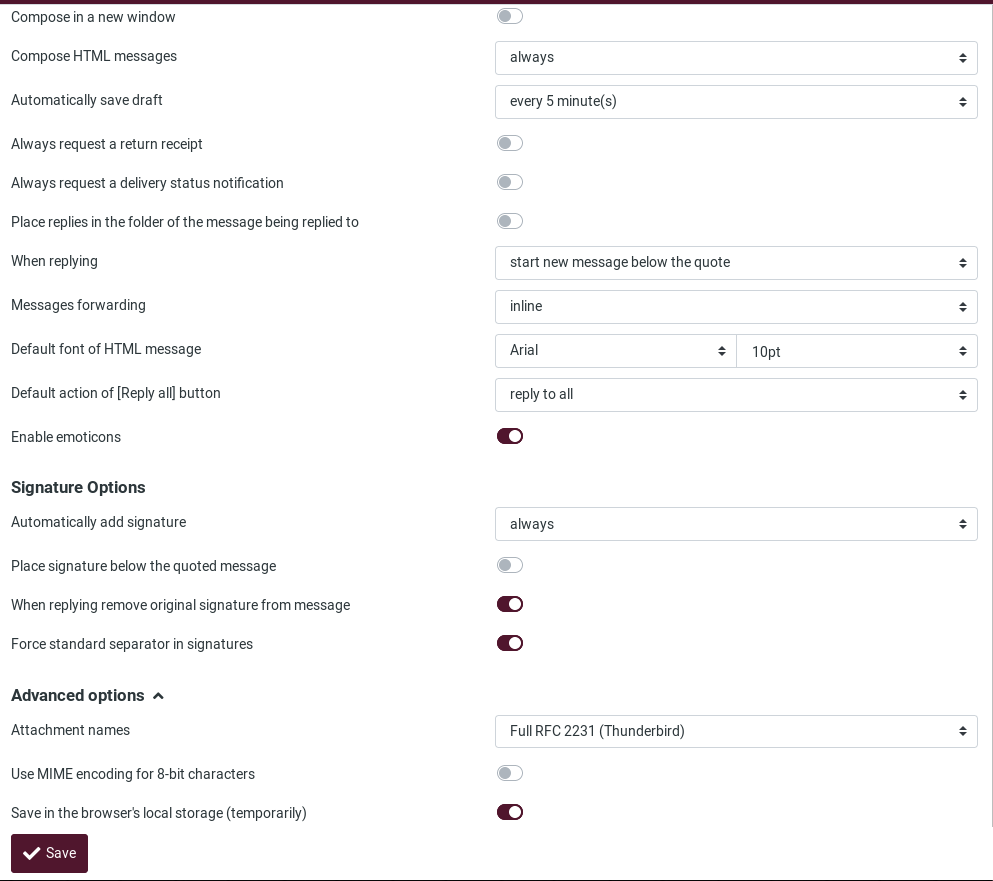
Compose in a new window: Enable this option to open the email composer in a new window instead of the current window/tab.
-
Compose HTML messages: Check this option to enable the rich text (HTML) editor when composing a new message. This is only the default setting for HTML message composing. It can be toggled at any time while composing.
-
Automatically save draft: While you write a new message, a copy will be saved to the Drafts folder ever few minutes.
-
Always request a return receipt: Enables the Return receipt sending option by default for new messages.
-
Always request a delivery status notification: Activates the Delivery status notification sending option by default for new messages.
-
Place replies in the folder of the message being replied to: Choose the current folder for saving the reply message to instead of saving it to the “Sent” folder.
-
When replying: This option controls whether and where to place the quoted original text when replying to a message.
-
Messages forwarding: Controls how messages are forwarded by default when clicking the Forward button without choosing a forward mode.
-
Default font of HTML message: When writing a formatted (HTML) message, this font face and size is used for the default text formatting.
-
Default action of [Reply all] button: When replying to messages coming from mailing lists, this setting controls how to reply to them.
-
Enable emoticons: Enables emoticons to be used in the message when it arrives at its destination.
Signature options
-
Automatically add signature: Select in which cases the signature text from your sender identity is added to a new message.
-
Place signature below the quoted message: When replying to a chain, this will enable your signature to be placed underneath it.
-
When replying remove original signature from message: This option removes detected signatures from the original message when citing it in the reply.
-
Force standard separator in signatures: When checked, two dashes (--) will be added before your signature.
Advanced options
-
Attachment names: Select the name encoding standard you want/need to use when sending attachments in messages.
-
Save in the browser's local storage (temporarily): This option allows or not to save information related to the composing of a message in the browser's local storage.
05. Contacts
Go to Settings, Preferences and choose Contacts.
These options and settings will control how your contacts are handled and displayed.

-
Default address book: Select here the default address book where new contacts are saved to when adding them from the email view.
-
List contacts as: You can choose how names are displayed in the contacts list.
-
Sorting columns: Select the contact attribute used for sorting the contacts in the list.
-
Rows per page: Enter here the number of contacts that will be displayed in the contacts list.
-
Skip alternative email addresses in autocompletion: When this option is checked, every contact will only appear once in the autocompletion list that appears when you start typing in the recipient field. The first email address of the selected contact will then be inserted. If disabled, all email addresses of a matching contact are displayed for selection.
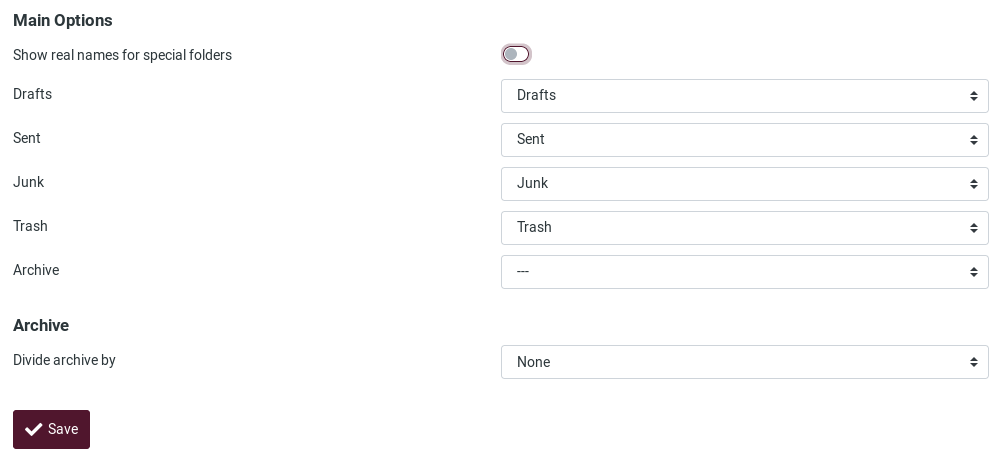
06. Special Folders
Some folders have specific purposes and are used by system processes to store messages. These settings allows you to choose which folders are used to store Drafts, Sent or deleted messages (Trash).
To access them, go to Settings, Preferences and choose Special Folders.

Main options
-
Show real names for special folders: Enabling this setting the original names of the assigned special folders will be displayed in the folders list instead of localized names.
-
Drafts / Sent / Junk / Trash: Change or set the mail folders.
-
Archive: If you set an Archive folder, when hitting the Archive button in the mail view, selected messages are moved to this folder.
Archive
- Divide archive by: This option allows you to organize your archive folder in various ways. The selected message(s) can be filed into sub-folders of the archive according the sent date, the sender's email address or the folder the message is moved from. When set to None, all messages will be stored in the Archive folder without any sub-folders being created.
07. Server Settings
These options provides more advanced settings that control how messages are treated by the email server.
To set or modify them, go to Settings, Preferences and choose Server Settings

Main options
-
Mark the message as read on delete: When this option is enabled, unread messages will be also flagged as read when deleting them right away.
-
Flag the message for deletion instead of delete: Email messages can be flagged as deleted first before they’re finally removed from a folder. That also allows to “undelete” them later on. In order to finally delete them, use the Compact command from the Mailbox folders operations menu.
-
Do not show deleted messages: This option suppresses messages flagged as deleted from being listed.
-
Directly delete messages in Junk: Messages in the Junk folder are also move to the Trash first when deleting them. Skip that step by enabling this option.
-
Mark the message as read on archive: Enable this option to flag as read the unread messages you send to the Archive folder.
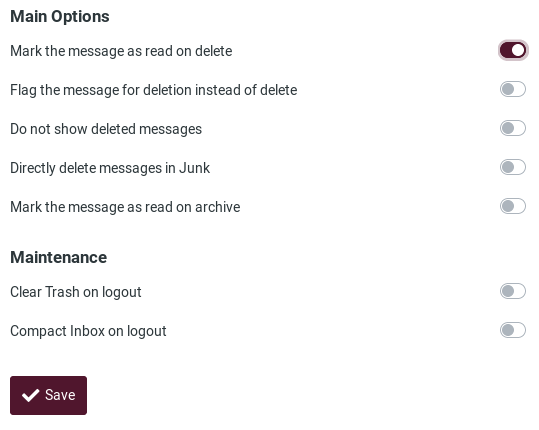
Maintenance
-
Clear Trash on logout: When checked, this will empty the Trash folder when you terminate the session.
-
Compact Inbox on logout: If you enable this option, all messages flagged for deletion from the Inbox will be removed when you log-off.
08. Delete Old Messages
Go to Settings, Preferences and choose Delete Old Messages to configure how messages are deleted after certain amount of time.

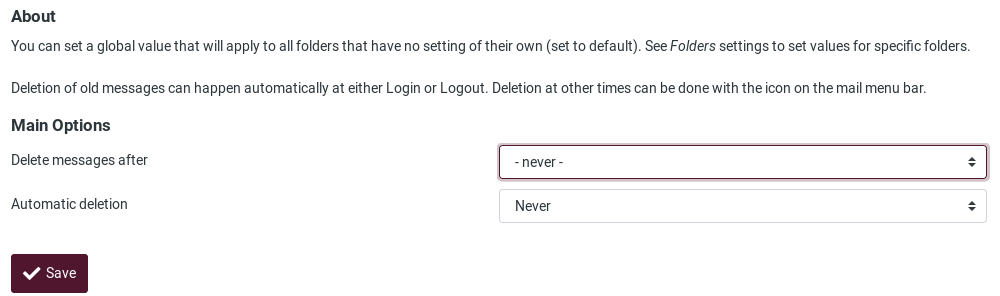
You can set those values per folder if you go the Folders settings.
09. Message Highlights
You can assign specific colors to the messages based on a rule.
To do it, go to Settings, Preferences and choose Message Highlights.

You will see this screen:
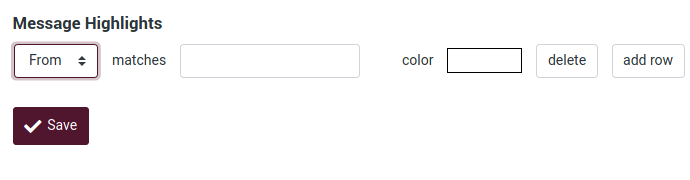
You can choose the Subject, From, To and CC information to build a rule. To add another rule field, click on add row.
Let's see an example.
Let's say you want all messages From support@disroot.org have a pink color background.
You will need to combine and build some criteria to apply to the messages. In our case...

... will result in: