6.3 KiB
Executable File
| title | published | indexed | visible | updated | taxonomy | page-toc | ||||||||||||||||
|---|---|---|---|---|---|---|---|---|---|---|---|---|---|---|---|---|---|---|---|---|---|---|
| Calendar: Web | true | true | false |
|
|
|
Using the Calendar app
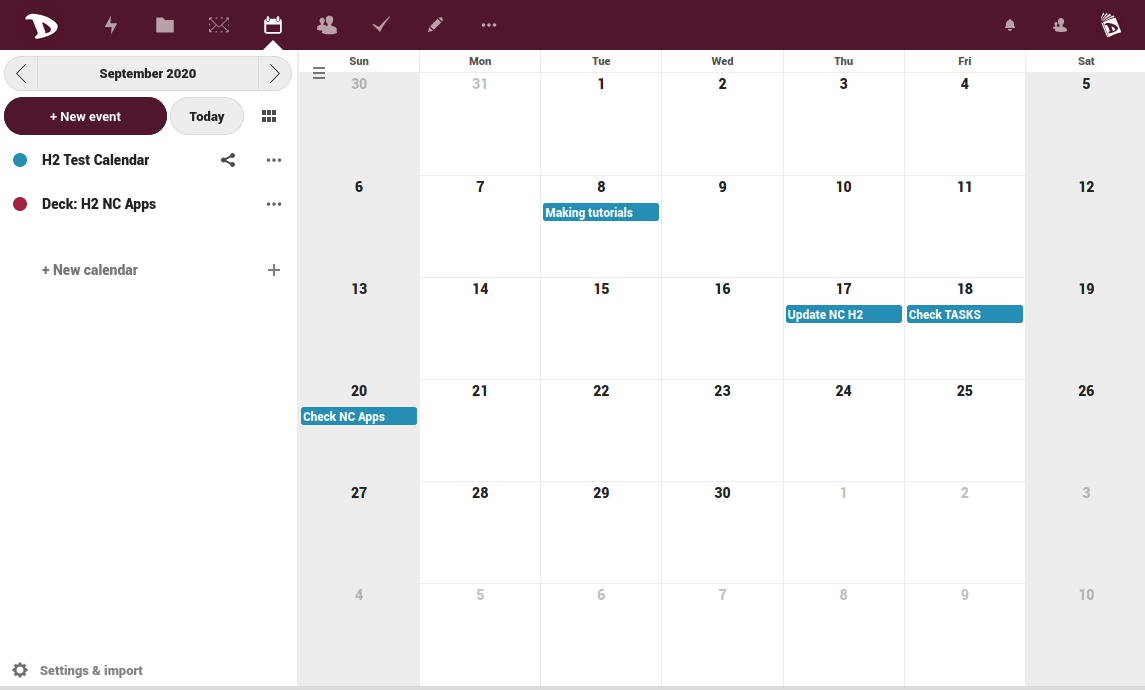
Login to the Cloud and access your calendar app by clicking the calendar icon in the top bar.

The left-pane in the calendar window gives you an overview of your calendars, their options and general settings.
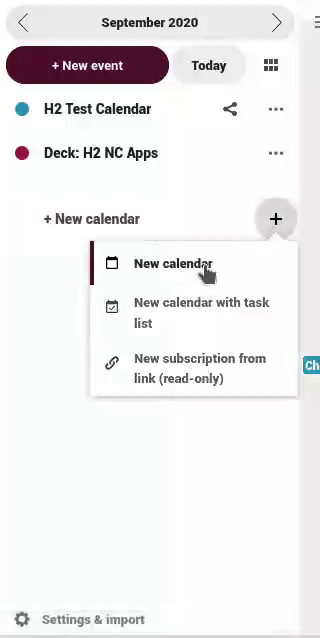
Create a Calendar
To create a new calendar just click New calendar. A small prompt will appear where you can type the name you want to give to this new calendar. Then press the ![]() arrow icon.
arrow icon.

You can create multiple calendars for different purposes (work, activism, etc.) by repeating this process.
Calendar options
On the left panel, you will see your calendars listed. By clicking on the three dots icon to the right of a calendar, you will access the options menu from where you can:
- Edit the calendar name
- Edit its color (useful if you have many calendars)
- Copy private link to get the calendar URL to sync it with other devices
- Download it (in which case a .ics will be created for that)
- Delete it

Sharing a calendar
To share a calendar click on the share icon ![]() , this will allow you choose how it will be shared.
, this will allow you choose how it will be shared.

Basically there are two sharing methods:
- Public link

A public link make the calendar viewable (read-only) to external users. Once the link is generated you can access some options related to it, such as: - Send the link via email - Copy the subscription link to the calendar - Copy the embedding code (it provides an HTML iframe in case you want to embed the calendar somewhere) - Delete the link
- User or groups
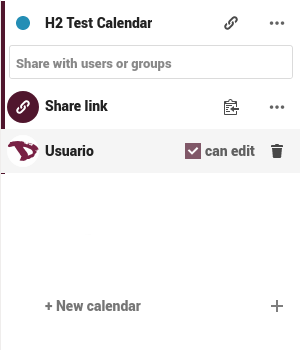
Enter the name of a user or group and select whether thay can edit the calendar or not. When sharing a calendar with edit permission, users with whom the calendar is shared will be able to create new events into the calendar as well as edit and delete existing ones.
Importing a calendar and other settings
You can tranfer any calendar and their respective events between Nextcloud instances by downloading and importing them from the Settings & import menu at the bottom left of the calendar window.
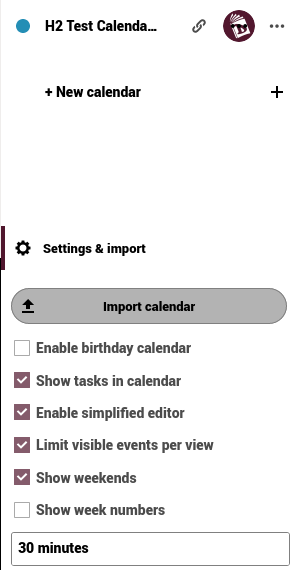
Click on Import calendar and select the calendar file (.ics) you want to upload.
In this menu you will also find some other options related to a selected calendar that are self-explanatory.
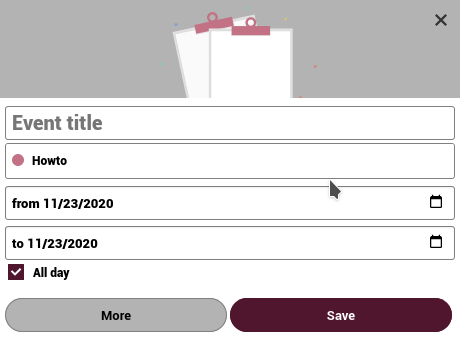
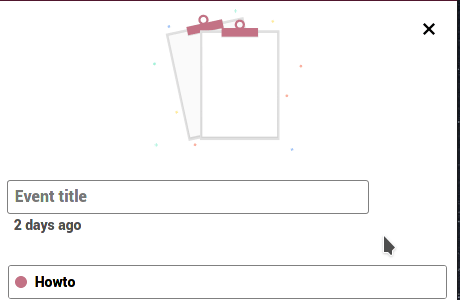
Creating an event
To create a new event in your calendar just click on the date of the event. A window will appear with very basic options such as Event title, choose which calendar to link it to, if it is an All day event or set the time range of it.
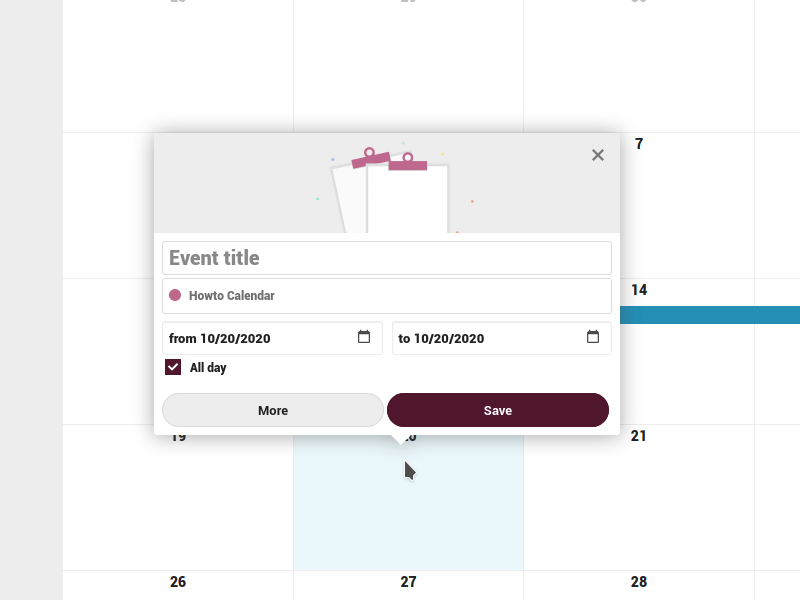
Remember that if you have more than one calendar, you must select to which one the event correspond, so that you avoid events/tasks ending up on the wrong calendar.
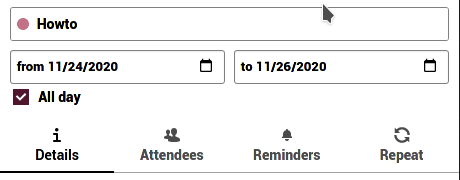
You can access more detailed options by clicking on the More button. A panel will appear on the right side, where you can add more complete information of the event.
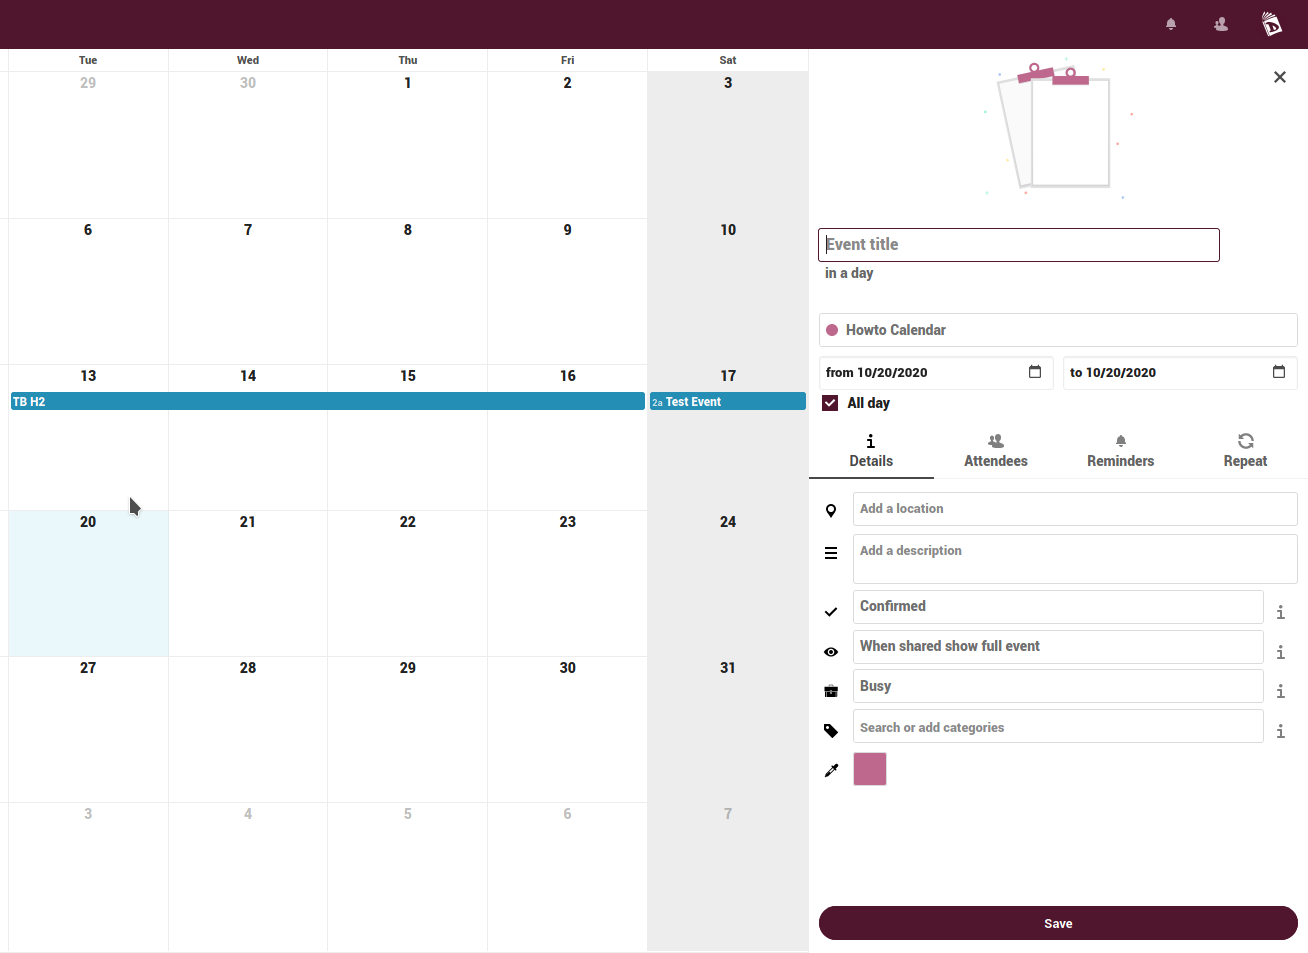
In this panel you will find and be able to set and edit the following options:
-
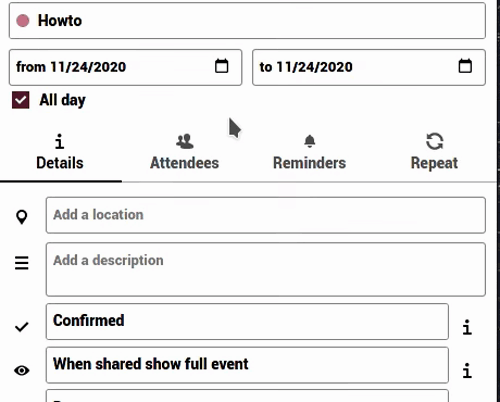
Details
-
Add an Event title
-
Select to which calendar the event goes to
-
Set the Start/End date and time
-
Select if it is an All day event
-
Add a location
-
Add a description
-
Set the overall status of the event (Confirmed/Tentative/Cancelled)
-
Set the visibility of the event when the calendar containing it is shared (Show full event/Show only busy/Hide the event)
-
Set how the event should be taken into account when calculating Free/Busy information
-
Add a Category to help you structure and organize your events
-
Edit the color

-
-
Attendees
You can invite people to an event by selecting the Attendees option and typing their email addresses, usernames (if they are other Cloud users), contacts in your addressbooks or even rooms.
You can also set the level of participation per-attendees, or disable email confirmation for a specific attendee.
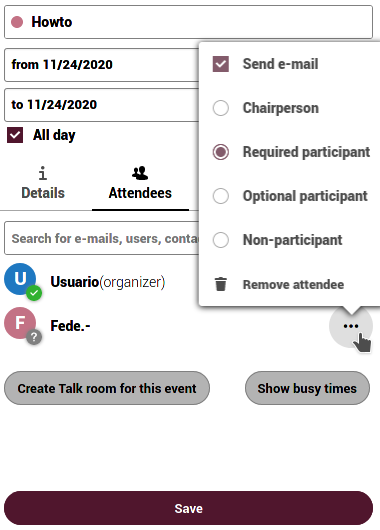
When you add other Cloud users to an event, you can access their Free/Busy information (if it’s available). This is very useful to determine when is the best time frame for your event.

NOTE: Remember that only the calendar owner can send out invitations. The attendees cannot do that, whether they have write access to the event’s calendar or not.
-
Reminders
You can set a reminder for the event by pressing on Reminders tab and then + Add reminder.
There are two notification methods:
- Email notification
- Nextcloud notification
You can set reminders at a time relative to the event or at a specific date.
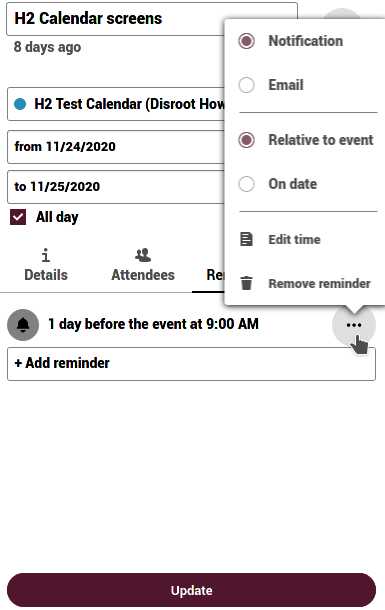

NOTE: Only the calendar owner and people or groups with whom the calendar is shared with write access will get notifications.
- Repeat
If this is a recurring event you can set it to happen every day, week, month or year. Specific rules can also be added to set which day of the week the event happens or more complex rules, for example, every second Tuesday of each month.
You can also tell when the recurrence ends.

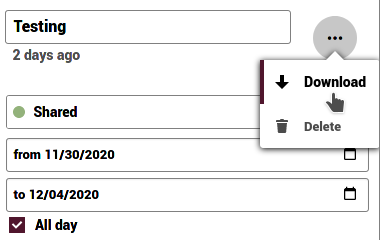
Edit or delete events
To edit an event you've created, click the event on your screen. This way you can edit the title, the calendar to which it belong to and the date.

By clicking on the More button you can do a more detailed edition and access to the event Download and Deletion options. Just click on the three dots menu at the right of the event title.